1. Introduction
2. Keep in mind
3. Stepping it up
4. Almost There
5. Putting it all together
 Introduction
First things first, before training any specific behaviour we need to take a time-out and think it through. Every agility handler in the world wants quick and consistent contacts that do not require screaming nor luck. But of course the method you use ultimately depends on you and your dogs. So among many these are some things you should consider before choosing two-on-two-off target contacts as your method of choice:
- My dog's build: Is my dog slight/heavy/stronger in the back legs or front legs/is the breed prone to hip dysplasia or elbow dysplasia
- My style of handling: Am I a sprinter/do I often lag behind
- My commitment: Am I ready to do what it takes/have the patience
I think of those three, the last may be the most important. I cannot stress enough that if you are planning to train contacts correctly you cannot skip a step or rush your training. This in my opinion is regressive training because without a proper foundation you may just as well not train contacts at all. This may sound harsh and I can already see some eyebrows lifting, but ladies and gentleman it is the truth.
Once you have read the above, stop, read it again. Go to bed thinking about it, read it again tomorrow morning then hop onto Google and find as many articles about agility training as you can, read those. Borrow books and dvd's. Make a list of your options, think carefully about each one. And then make an informed decision.
That out of the way, I will now explain step-by-step the method that I have chosen and tweaked to teach my contact. My method has been influenced by many books, dvd's, handlers, trainers and most of all dogs, so I cannot call it my own, but it has been an interesting journey. Those who have read Shaping Success will immediately see that ALOT of my content is based on Susan Garrett's work and I reccommend this book to all agility handlers.
Keep in Mind
This article assumes that your dog has mastered some basic obedience. Without sits, stays, stands, waits etc. you will struggle in your agility career. It also assumes that you have a reliable release command.
Each dog is different and if you do decide to follow my method you will occasionally run into a problem. Here you need to use your own creativity to solve and overcome the obstacle. Feel free to ask questions and I will do my best to answer.
Never be afraid to go back to basics for a day or two to refresh your dog's memory.
Training IS patience. This will take a long time, do not try to rush your dog, because you WILL regret it.
Always keep it fun. Never train when you are angry or irritated, you will only shoot yourself in the foot.
I use a clicker for my contact training, hence the article is written in this context. But it is possible to teach it with a clicker. Do not start training the method until your dog (and you) are comfortable with the clicker and its purpose.

The Beginning
Initially my training starts in three completely independent steps, that can be trained simultaneously: The target; The obstacle; The position.
The Target
First of all is of course the start to my target training. Feeding time is the perfect opportunity to initiate this concept. I sit in a chair with my dog in front of me and his bowl of food in my lap. At his stage I am not too worried about my the position my dog chooses. Use an obvious target (A margarine or feta container lid should do fine) and place some of your pup's dinner in the palm of your hand with the lid covering the food. Most dogs will immediately come sniffing, but if he is unsure, hold out your hand slightly. By sniffing for the food your dog's nose will inevitably touch the lid. This is the behaviour you want to click for. As most trainers will tell you, the timing of your click is very important. You want to click as your dog's nose is touching the target. Your ultimate goal for this exercise is that an enthusiastic dog that lunges at the target the moment you take it into your hand.
Your next step is of course to hold out the target with no food in your hand. If you stuck with step one for a while your dog, should not hesitate to confidently touch the target and wait for his reward. To proof this exercise, change the positioning of your hand (holding the target of course), hold it out to your side or behind you. Use both hands to hold the target. Stand up or sit on the floor while holding the target. This ensures that your dog realises that the ultimate goal is to touch that little lid, no matter of the circumstances. Remember to change your environment (not too drastically mind you), so use different rooms or even give it a try outside.
Once you are happy with your dog's behaviour of touching the target in your hand, you would of course like to him to start touching the target in any place you might like to have it. This is the most difficult step to initiate, as it is quite a leap from your hand to the floor. Here is my solution: With your dog in front of you, drop the target on the floor. Now most dogs will immediately give it a quick sniff, to establish what had just rained down from the sky. I cannot stress the importance enough of getting your timing right on this specific click. You will only have a split second of curious investigation to click for the correct behaviour. If your dog does not sniff the target again after receiving his reward, you may pick it up and drop it in a different spot, or even just give it a nudge with your foot to draw your dog's attention back on the target. Always remember to look at the target yourself and face your body toward it. Body language is important even in a basic exercise like this. If your dog is very 'mommy-focused' you may need to hold out the target (as in step two) and drop it just before the dog comes in to touch the target, hopefully his nose will follow the flying lid all the way to the ground. This step will take some time to master. Your goal is to have a dog that will voluntarily touch the target that you put down without any encouragement necessary.
Before I continue I would like to clear up two things. You may have noticed that I make no mention of commands up to this stage. I never teach my dog a command before I am not 100% sure that they will perform the behaviour. Since my 'touch' command will never apply to my dog touching a target that is hand-held, I never associate my command with it. Of course if you want a different command (from your eventual command you will be using on the contact) to be linked to the hand-target touches, you may add this. BUT only add a command once you are confident your dog will perform the behaviour. The order goes something like this: Dog consistently performs behaviour; Add command simultaneous with click AS the dog performs the behaviour (NOT BEFORE); Eventually attempt using command (ONCE and ONCE only) if dog does not perform behaviour go back to adding command as dog performs behaviour. Rinse and repeat. So once I am confident my dog will touch the target on the floor, I add a 'touch it' command, simultaneous with the click and follow the steps above.
The second aspect that I would like to clarify is a sensitive point where many trainers and handlers disagree with me. You may have noticed that never under any circumstances do I ever place food on the target as encouragement. This is done for two very important reasons. First of all, I don't at any point want my dog to associate the target with food. The target should be associated with a behaviour for which the dog gets rewarded, thus the food is a REWARD not a MOTIVATION. This will only become a problem in advanced training once you are trying to fade your target, but it is of utter importance to me. My second motivation is my belief in training sequence: Command; Motivation (if necessary); Behaviour; Confirmation; Reward. Motivation is a funny thing in dog training, because inevitably all food and toy motivation is absent in a show environment, so it is always advisable to keep your motivation to verbal and body movements rather than toys and food. If you place food on the target, you will be saying okay now I am asking you to do something, then you are getting rewarded and then I will give you confirmation that is the correct behaviour. In my experience, dogs that are trained with food on the target (all the way through advanced training), have a very low consistency rating in the show ring... 'Hey, mom, there is no food on here, so I will just jump off and go and do my own thing.'
There is a third reason, which is for pure selfish reasons. I always ween my dogs off a food reward and all reward becomes play and toys (yes even clicker rewards), for the simple reasons that food is hard to handle while training on an agility course and it is easier to promote the fun aspect of agility using toys.
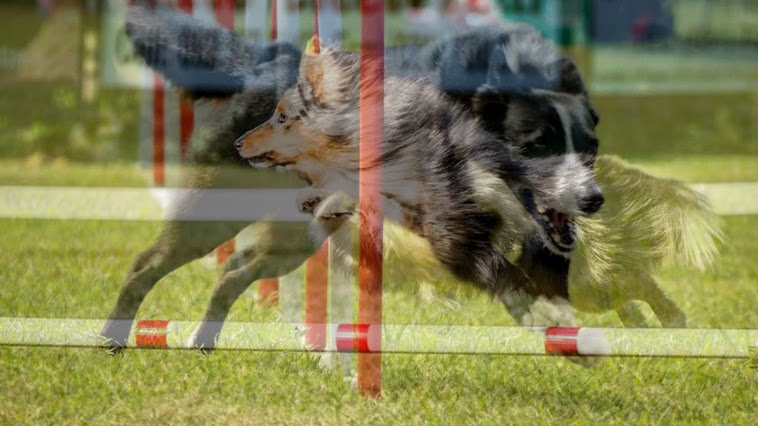
The Obstacle
This part of my training is dependant on my dog's age, as I don't recommend introducing full sized contact equipment until your dog is AT LEAST 12-months old. Also keep in mind, that this part is much easier in confident dogs. First I will discuss the Dog walk and A-frame and then some exercises on the see-saw.
To be able to perform a contact obstacle at high speeds, it must gain the confidence (and of course receive the reward) for doing just that. So while my dog is still in-target-training, I introduce the obstacles. I do so by employing a combination of various techniques. Even though we are not too worried about whether our dog touches contacts at this particular moment, we do not want to teach our dogs to jump off from the middle of the dog-walk or the apex of the A-frame. Please not it is ideal to start these exercises on 'baby' contacts, but can be started on full sized obstacles. Hence I use back-chaining to teach the initial obstacle. Place a toy at the bottom of the obstacle (appr 1m after the end of the down-ramp), pick up Fido and place him just above the contact area of the obstacle holding him back and focusing his attention on said toy, get him nice and excited and let go... Ideally Fido will race down the contact and go and grab his toy. The secret to this exercise is getting some form of Independence between dog and handler... Initially you will obviously running with your pup, but soon he will realise that this is a big game and will be rearing to get the toy, whether you are with him or not. This is the ideal time to build up some independence on the obstacle, start off by giving your 'fetch it' or 'get it' command, let Fido go, but do not follow up all the way. Once your dog is confident enough, you can even stand still and watch in awe as Fido flies down in rocket speed. To really proof this exercise, try running the opposite way and see what your dog does.
By placing your dog just above the start of the contact, you are almost guaranteed that he will touch the contact in some way, shape or form, but of course we have to progress. For the next step you will be placing your pooch halfway down the down ramp of the obstacle and doing the exact same exercise. So here is a bit of trouble shooting advice for those that may own the same kind of hooligans I do... the kind that is more than happy to leap from the top of the down ramp of the dog walk if it means getting to the squeaky toy. Teach your dog how to perform a hoop. Start off with the hoop on the ground, hold your dog with his nose already through the hoop and throw the ball (you are welcome to throw in a click as his back legs passes through the hoop to confirm the behaviour). Progress this exercise until your dog confidently shoots through the hoop en route to pick up his beloved toy. So if your dog develops a tendency to leap of the obstacle rather encourage him to run down through the hoop, it will make your eventual two-on-two-off training so much easier.
This back-chaining exercise can be progressed at your dogs own pace: Just above the contact; Halfway down the ramp; Top of the ramp; Middle of the dog walk/A-frame and eventually you can ask your dog to run over the entire obstacle. Your ultimate goal is to have a dog that runs full-speed over the obstacle without thinking twice and as long as you have safe regulation equipment on even ground there is never a reason to slow your dog down. Your dog will perform this at a speed he is comfortable with, always remember this, by screaming wait and stop from 10m behind your dog, you are risking its safety by encouraging Fido to look back at mom instead of where he is going.
As far as the see-saw goes I don't do much back chaining... here I have a different exercise, which unfortunately requires two people. You need an assistant to hold your dog at the bottom of the see-saw, while you stand at the other end, firmly restraining the plank (with your hand or chest). When you call Fido, your assistant may let go (hopefully this sees Fido speeding full-out up the plank towards mom), once your dog reaches you a verbal or food reward can be given before you very gently let the plank tip (100% controlled) and then allow Fido to run off the see-saw for another reward. The goal is to lessen your resistance over time, in order to acclimate Fido to the speed the plank will be tipping at. So eventually you will have a dog that speeds toward the end of the plank and then waits for the tip before releasing from the obstacle. This method prevents inconsistencies due to the weighting of different see-saws, your dog has no need to search for the tip-point of the seesaw and wait there. Please note that it is always a good idea to bomb-proof the dog to the noise of a banging see-saw before proceeding onto this obstacle.
As far as commands got it is once again important to only incorporate the command once you are sure your dog will perform the obstacle. There is no harm in adding your final command for the obstacle at this stage, since your contact command will be separate. My command for all the contact obstacles are the same ('walk it') but in recent days I have seen the advantage in having a separate command for each one ('frame' ' dog walk' 'seesaw' etc), this choice is ultimately up to the handler. But it is important that you only add the command after your dog is performing the ENTIRE obstacle at a speed that you are happy with. If your dog initially performs the dog walk at a slow pace on command and gets rewarded for it, you are teaching your dog that it is okay to do it at that pace, so rather wait until your dog is living up to your expectations before you add a 'forever command'.
Another tip: Once your dog is VERY confident on the obstacle, place tunnels underneath and obstacles nearby, to introduce normal course conditions.

The Position
We can all agree that our it is rather unnatural for our dogs to stand with their bum in the air. So I include an exercise in order to get my dogs used to it.
Hopefully all of you still do some basic training sessions regularly (no matter the level of your dog). Things like waits; circles for directionals; front- back- and blind crosses on the flat. This is a part of training that NEVER ends as long as your dog competes. You can add to your contact training in these training sessions by finding a step (of any kind as long as it is not too high) and asking for a stand stay with their back legs positioned on the top of the step and front legs at the bottom. This exercise has two benefits for our dogs, the most obvious is practising our wait command and the second is to introduce our dog to the position that they will be waiting in.
While doing this exercise I will vary my release as much as possible: Sometimes I will return to my dog before I release, I will release them form the wait standing in front of them, behind them, to both sides. I will place a jump at some distance, release them and ask them to take the jump... These are just a few ideas, but I am sure you get the idea, your goal is to be have the ability to have your dog wait in a two-on-two-off position regardless of your position and release only on command.
Stepping it up
During the next level of our training we will stick to the same routine on The Obstacle and The Position, our only advance will be in the The Target sessions. We have now established that little Fido will touch his target on command, we are yet to set boundaries on how this behaviour is to be performed. We will do this in slow progression. First of all we want to ascertain that this command can be performed at a distance and then we will teach our dogs that the behaviour is to stay at the target rather than return to mommy after they have touched.
Gaining the distance
This step is simple enough, we will start by placing the target 1m in front of us, get Fido on our side in a nice heal position, next get Fido focused on the target. The same principles apply as in our initial target training, the handler should be looking at the target and facing the target with their body, once you feel Fido knows where the target is, give him the command to 'go touch' and start off with him. If you need to follow up all the way to the target this is no problem at all. Eventually Fido will know where the target is and be quite happy to 'go touch' on his own, but be sure to give your initial rewards in the vicinity of the target, hence the sequence goes like this: Command; Behaviour (Fido touches, while mom stands still); Confirmation (click) and while you are busy clicking, move forward and give the reward. Your next step will be to start teaching your dog to remain at the target, there are two exercises to initialise this behaviour.
The Target Remains
First of all we are going to start asking for repeated touches: As Fido performs his first touch, click and immediately ask for a second touch, move in and reward near the target. You can ask for anything between 1 and 4 touches on one exercise, remember to vary it often. Your dog will start hanging around the target to perform more touches if you happen to ask for them. Remember not to use the dog's name with each touch command, because calling our dog's name, means come here.
Our second exercise is where our release command becomes important. Since we don't want to teach a WAIT command for this exercise (ie that our touch on the contact requires a second wait command for our dog to remain the requested position), we will use our release command to create the illusion to our dog that he has been waiting. As before, place your target at a short distance and ask your dog to 'go touch' as he touches do your normal click and immediately give your release command and click for the release (most dogs, will come to you when they are released since they haven't been asked to do anything else, but click for the release even if they move in another direction). This exercise has the dual purpose of teaching our dog to stay at the target as well as being able to release the dog from a distance.
Once your dog is hanging around the target to wait and see if he is expected to touch again or come back to you, you can start integrating these two exercises. Ask Fido for repeated touches and then give your release command and only then will he receive the reward. You can start building on this exercise by placing the target after a hurdle or tunnel, asking your dog to perform the said obstacle and then to 'go touch'. Of course it is also important to build the distance until you can ask your dog to 'go touch' a target that is 10m away (this is not unrealistic, as the dog walk is longer than that). This step of training creates a completely independent performance of the target and that is the essence of successful target contacts.
If you choose, you may start reducing the size of your targets at this level of training. As will be demonstrated, it is advantageous to fade targets gradually to obtain your eventual goal.
 Almost There
Since your targeting should be spot on in this stage, we will integrate another step into our training. We will teach our dog the correct body position, since we do not want Fido swing his bum around and facing mom while on the contact obstacle. We will do so by integrating our The Position exercises and our targeting. We are now going to move our target ONTO the step.
Ideally you want to find a spot where you have a step situated next to a wall. Place Fido with his side right up against the wall (obviously with you on the other side of Fido) in his two-on-two-off wait position, do not give a wait command, but place the target on the bottom step and ask for a touch. Reward and release. Initially it may be necessary for the handler to restrain the dog from moving his bum from the top step by holding his back legs gently yet firmly in place. Once the dog is willingly touching his target in the two-on-two off position, it is time to build the distance. With the target in place on the bottom step, hold Fido side to the wall (handler on the other side) about 1m from the top step and ask for a 'go touch'. As Fido touches, before he even has a chance to move his back legs off the step, click move in and reward. If his back legs happen to pop off, just help him back into the correct position and reward. This exercise can be very trying, but it is essential only to reward if both requirements are met: two-on-two-off position as well as the nose touch.
As before once Fido has this exercise down pat, we are going to start building the distance as well as varying the handler's position as long as the golden rules (Position and Touch) are followed, you need to proof this step to beyond reasonable doubt.
Putting it All Together
The dog walk and A-frame
Most handler's would expect this to be the hardest part, but if all the above exercises are in place and you have not rushed through all the tedious basic training, this is the part that will be as easy as pie. You can start training this step on a contact trainer, but there is no harm in starting off on the contact obstacles either.
Up until now, we have allowed our dogs to perform contact obstacles to gain confidence, but as soon as you start integrating your contact training onto the physical obstacles it is essential that we discontinue our 'free runs' on the obstacles to ensure that no confusion steps in. We will teach our contact behaviour as a back-chaining exercise again. It is recommend that, to start off with, you raise the bottom of the ramp ever so slightly (you may place bricks under it for example - just be sure that the obstacle is completely stable) to imitate the height difference of the step that we were using in the previous level of training.
Pick Fido up and place him in his two-on-two-off position on the bottom of the contact, with the target a comfortable distance from the nose (this is dependant on the size and build of the dog, personally I place the target so my dog has his back legs on the very bottom of the contact) and ask for a touch, click and reward. It is very important to do this on on both sides. Of course this is where the importance of your release comes in, once released, your dog should get off the contact and move away from it, by now you should be guessing that we will be varying our release position until we have all angles covered. Release Fido while standing behind him, in front of him, next to him etc. Place other obstacles close by and ask him to perform them after release and before rewarding or ask him to ignore the obstacles to come to you, just remember that proofing a dog's performance is up to his handler and his handler alone.
Once your dog is confidently touching his target when place on the contact it is time to start the back chaining process as before. Start by placing the dog just above the contact area and ask for a go touch and once again remember to only reward for the correct behaviour (two-on-two-off position and a nose touch. I will stop repeating myself by stressing the importance of varying your release position. Once Fido is confident with this step we will continue the back-chaining as normal (Middle of down ramp; top of down-ramp; middle of dog walk, top of up-ramp). Your obstacle's down ramp should be raised during the entire back-chaining process and only once your dog is performing the obstacle consistently can you gradually start reducing the 'height of the down ramp' by removing the bricks (or whichever material you were using) until you have your dog performing the normal dog walk.
When you are ready to attempt the full obstacle, you can ask Fido to 'walk-it' and immediately to 'go-touch', since the essence of our training has been to go touch the target as quickly as possible, the timing of your touch command should have no affect on Fido's speed or performance of the obstacle.
The see-saw
It is essential to teach the dog walk before the see-saw is attempted.
The see-saw is taught in a slightly different method, we need to go back to our initial see-saw training. Before Fido comes into the game, push the see-saw down and place the target the same distance as for the dog walk, get an assistant to hold Fido while you restrain the obstacle. Once Fido reaches you at the end of the ramp, let the ramp down slowly and ask for a touch immediately. Please note it will take Fido a second to observe the target. Once again you will gradually lessen your resistance on the see-saw until your dog performs it confidently.
A note on fading targets
This is not a subject that I have discussed in depth, but the ultimate idea is to reduce the size of your targets very gradually through out the training process. Hence by the time you reach the final stages you will be working with a target of about 2cmx2cm. Once your dog is performing the obstacles with his eyes closed, you can completely fade the target, as by this stage your dog would have learnt the entire behaviour for a contact obstacle: Run it as fast as I can; Stop with my back legs on and front legs on the grass; Touch my nose to the ground and wait for my nest command.
The End
I haven't made one mention of the up-contacts as that is a completely different subject for a different day and has nothing to do with the behaviour we just taught.
Reading this article back to myself, the few short pages, it is hard to think that this process takes months and even years to perfect. It reminded me that the essence of dog training can be so simple but it is the conviction and commitment that counts. The secret is never to lose hope and patience, but most of all, if BOTH your dog and you are not having fun, it is time to do some serious soul-searching and decide on your course of action before either of your spirit's gets broken.
No comments:
Post a Comment